Arguably one of the best features of Unreal Engine 4 is the Material Editor. You don’t need to learn shader code (HLSL) to modify the appearance of a surface, instead you simply drop a few nodes, connect the right inputs and you’re done. Easy, right? When creating more complex materials you might spend a considerable amount of time working with the Material Editor and you might find yourself looking to increase efficiency. That’s what this article is intending to do – help you to get more done in less time. Some points covered here can be found in the Unreal Engine Documentation, in which case, let this be a quick reminder for you. Some things are not documented and I learned them over the years working with the editor. Let me share those insights with you in the hopes that they are as useful to you as they have been to me.
(This article is written for UE4 version 4.16. Other versions might differ slightly)
1. Use (custom) Hotkeys
Nothing beats the speed of using hotkeys. Before talking about some more advanced ones, let’s first cover the very basics. Copy, paste, duplicate, undo, redo, save and apply. Yes, the very basics. Productivity starts here. If you don’t use these, you have much to learn.
| Ctrl + C | Copy nodes |
| Ctrl + V | Paste nodes |
| Ctrl + W | Duplicate nodes |
| Ctrl + Z | Undo |
| Ctrl + Y | Redo |
| Enter | Apply changes |
| Ctrl + S | Save all |
Copying and pasting nodes works across multiple Material Editor windows and (usually) even across different engine versions. The copied nodes are actually converted to text when saved to the clipboard and you can share node setups as text files. (The same is true for blueprints by the way. Check out https://blueprintue.com/ if you want to share blueprint code snippets online)
Apart from these, there are some other functions which are frequently used in the Material Editor, which don’t have a hotkey set by default. You can set custom hotkeys in the Editor Preferences > General > Keyboard Shortcuts > Material Editor. Go through that list and set yourself some hotkeys for features you use often. Some functions I frequently use are Convert to Constant, Convert to Parameter and most of all Start Previewing Node, which also ends the preview of the currently selected node.
Next, let’s talk about hotkeys for placing specific nodes. You hold down a specific key or key combination and left click to place a node of a specific type. You probably know about holding down 1 to create a constant node and T to create a texture sample node. Here’s a full list of the default hotkeys for spawning nodes. These can also be adjusted in the Editor Preferences and update immediately.
| A | Add |
| B | BumpOffset |
| C | Comment |
| D | Divide |
| E | Power |
| F | MaterialFunctionCall |
| I | If |
| L | LinearInterpolate (Lerp) |
| M | Multiply |
| N | Normalize |
| O | OneMinus |
| P | Panner |
| R | ReflectionVector |
| S | ScalarParameter |
| T | TextureSample |
| U | TexCoord |
| V | VectorParameter |
| 1 | Constant |
| 2 | Constant2Vector |
| 3 | Constant3Vector |
| 4 | Constant4Vector |
| Shift + C | ComponentMask |
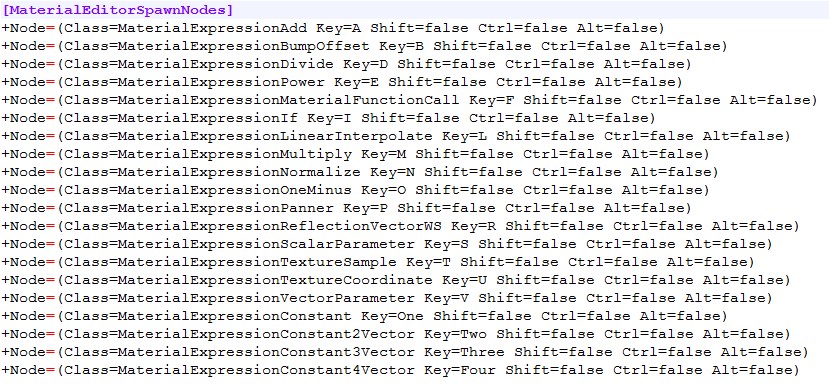
Very few people know that you can set hotkeys to spawn any Material Expression node, even the ones that don’t show up by default in the preferences. Take a look at your engine folder and locate the BaseEditorPerProjectUserSettings.ini file. It should be in the \Engine\Config\ folder for each specific engine version you have installed. Open the .ini file with any text editor and you’ll find a section titled MaterialEditorSpawnNodes below which you find the hotkeys for spawning some specific nodes.
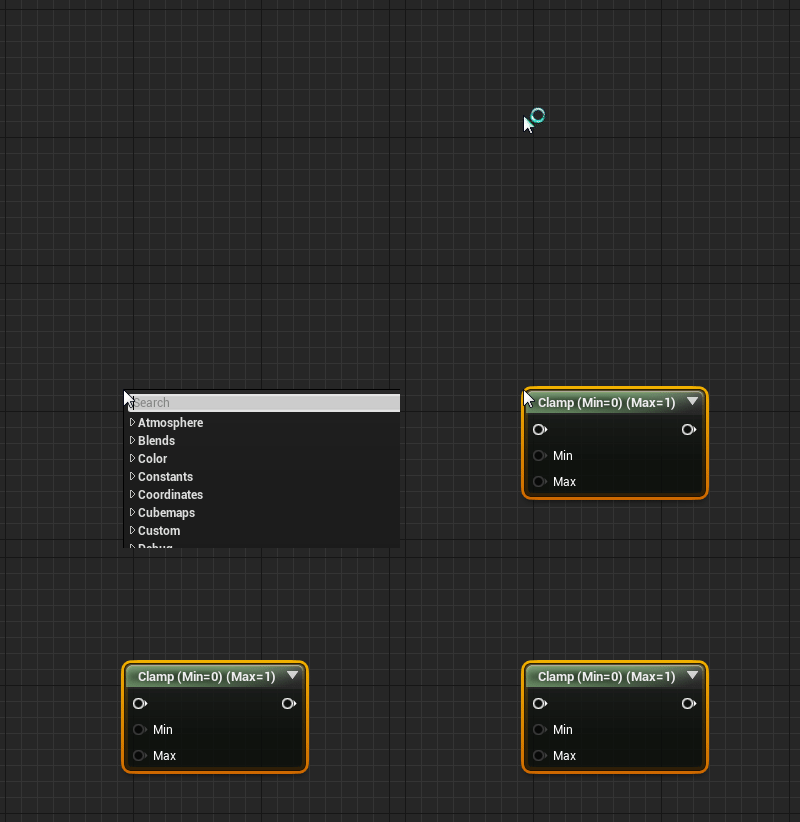
Let’s say you want to add a hotkey for placing a clamp node. You duplicate the last line and change the class to MaterialExpressionClamp and set as key whatever you want. In this case I set the hotkey to Alt + C (+ left click).
The Material Expression class is usually named exactly like the node itself. Keep in mind, this only works for Material Expression nodes, so nodes, which are defined in the engine code, not Material Functions, which are created inside the Material Editor. The list of Material Expressions is quite long and it’s up to you to decide which are worth defining a hotkey for. A complete list of expressions can be found in the Palette, which we’ll cover later. After you add a line to the .ini file you need to restart the editor for the hotkeys to work. Any expression you add to the .ini file also appears in the Editor Preferences and you can adjust the hotkey there as well.
2. Use the Right-Click Menu to Find and Place Nodes
If you haven’t set a hotkey for a specific node, the fastest way to place it is to use the right-click menu. Simply right click on the empty space in the Graph Panel and start typing the name of the node you’re looking for. If there are several hits for your search term, the most common one is highlighted, which you can place by simply hitting enter or clicking on it. Nothing extraordinary here, that’s very straight forward. I’d like to point out that this is usually the faster way to place a node than selecting it in the Palette.
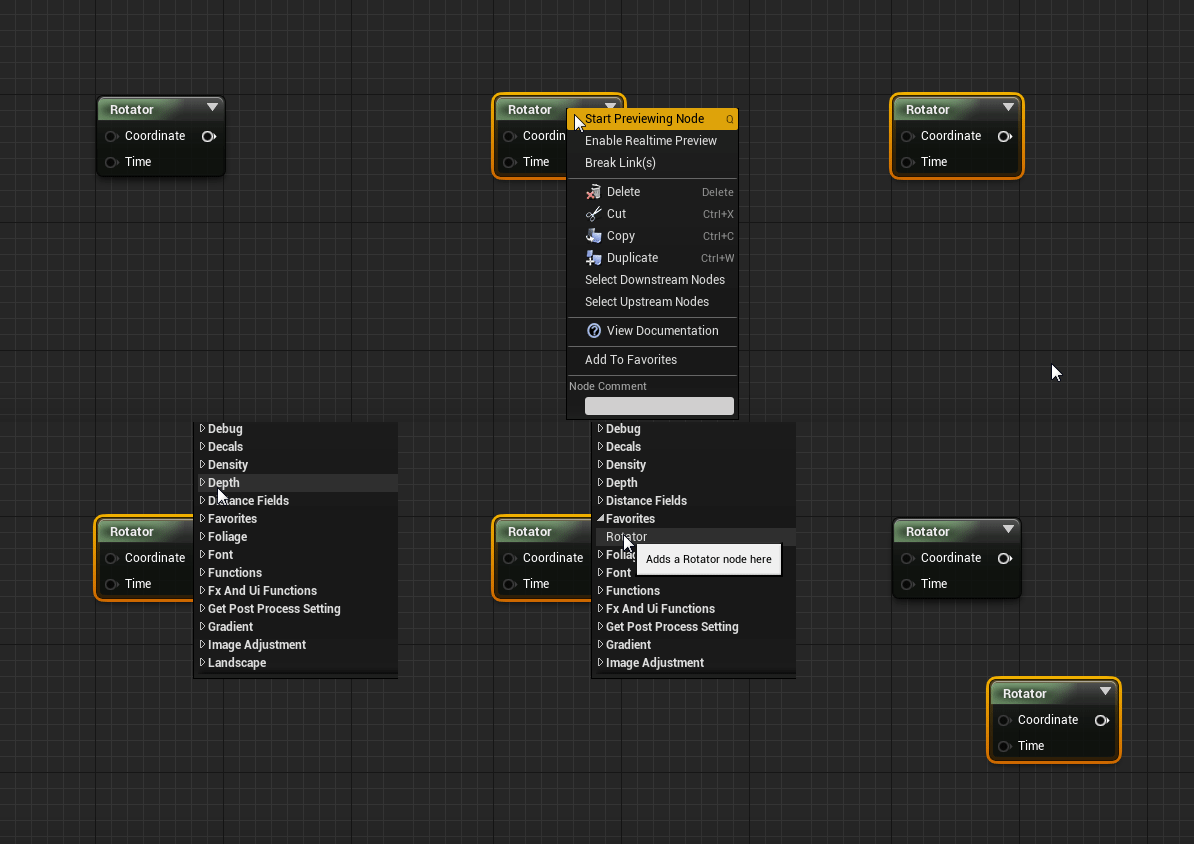
3. Set Nodes as Favorites
If you’re running out of key combinations on your keyboard to assign hotkeys to Material Expression nodes (I doubt it 🙂 ), or if you prefer a list of frequently used nodes you can set yourself some favorites. Right click a node and choose Add To Favorites. The node now shows up in the favorites category in the right-click search menu. You can also quickly right click and type fav to get a list of all the nodes you added to your favorites before. They also show up in the Palette after you’ve closed and reopened the Material Editor. Once again, this unfortunately doesn’t work with Material Functions, only Material Expressions.
4. Use the Palette
The Palette is a menu that shows all the available Material Expressions and Material Functions in a big list sorted by category. By default it’s shown on the right-hand side of the Material Editor window. If you closed it before, you can open it again through the menu bar Window > Palette. Previously I mentioned that using the right-click menu is faster than using the Palette. That’s mostly true. However, it can be useful to simply display your favorites in the palette and use that list to quickly drag and drop whatever you need, while keeping a better overview compared to the right-click menu. I’d say this comes down to personal preference.
5. Use Material Instances to Preview Changes More Quickly
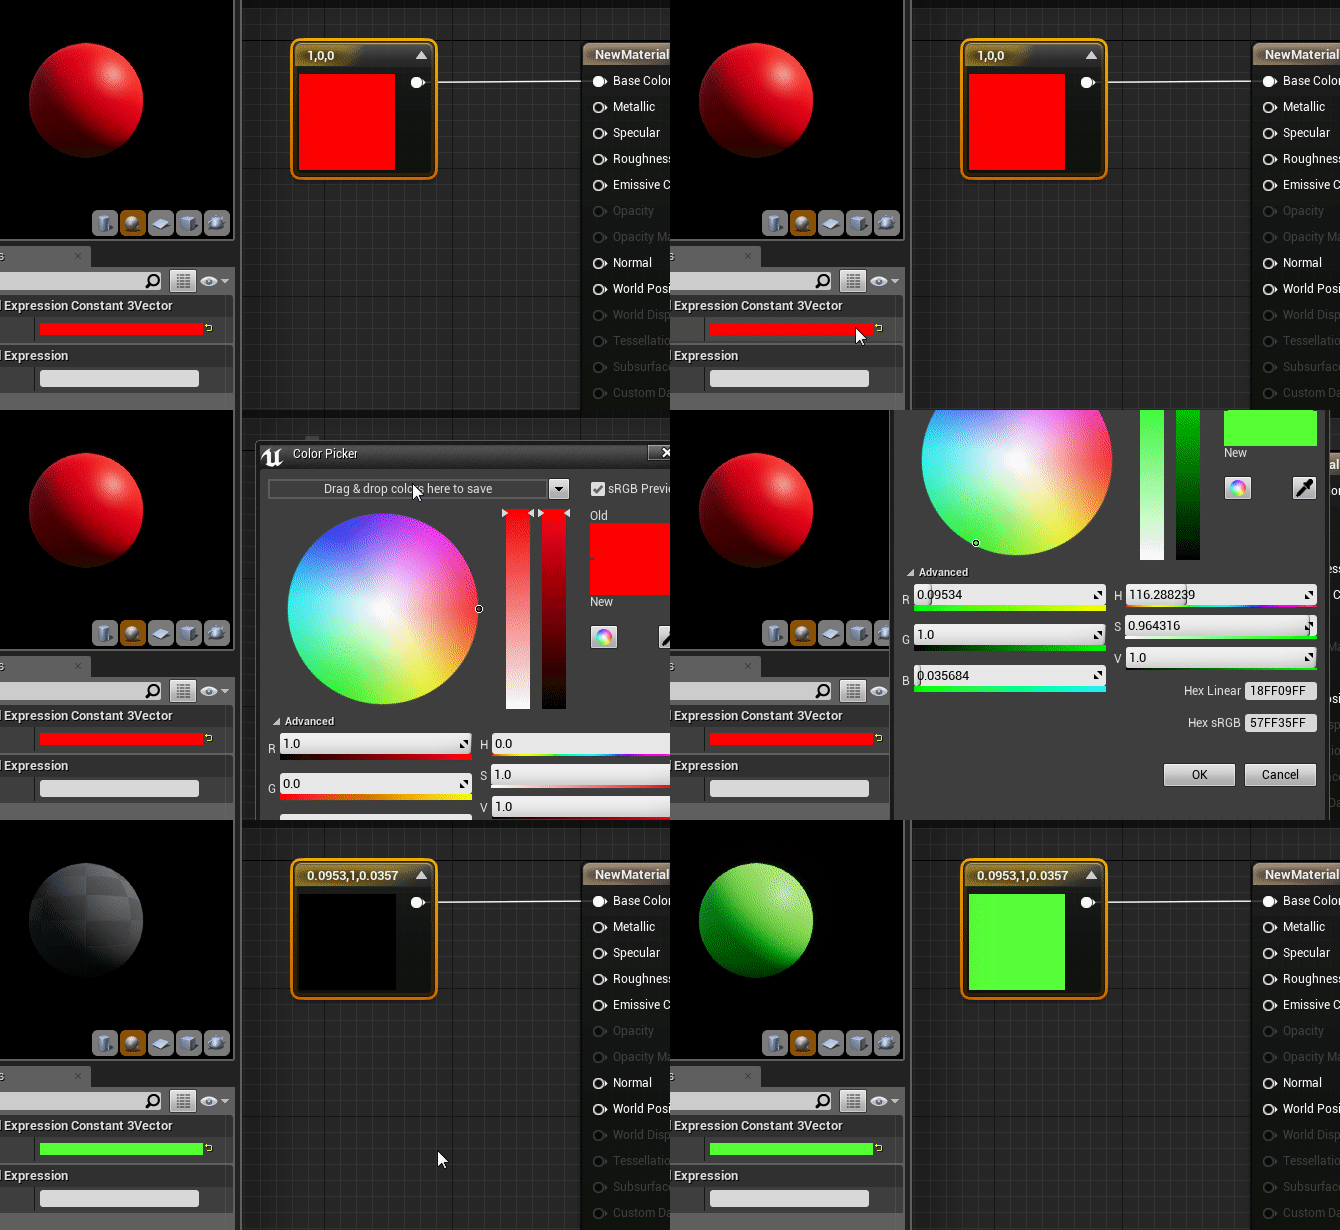
Whenever you make a change to the Material Graph the shaders get recompiled in the background and then the preview gets updated. This recompiling can take anywhere from a fraction of a second to 20 seconds or longer, depending on the complexity of your graph. When you want to adjust a few values in your graph, waiting for shaders to compile after every little number you change can quickly add up to a considerable amount of time. In that case, use parameters and make a material instance. Material instances don’t need to be compiled when their parameters change, so you can quickly try several combinations of values and tweak your parameters until you like the result, without wasting any time waiting. Don’t just consider this when your materials get really complex. Even for simple materials it can be time saving to create a material instance. Here’s a quick comparison of how long it takes to change the color for a material and for a material instance.

With my setup it takes about 1 second for shaders to recompile after changing the color in a simple material.
Check the Unreal Engine Documentation on more information of how to set up and work with Material Instances.
6. Use Material Functions
Like I mentioned in my “How to keep your blueprint code organized and easy to read” article, don’t duplicate your code. If you use a few nodes to make a nice panner effect for a smoke texture and you feel the need to duplicate the nodes and use them for a second texture, stop right there and create a material function instead. Chances are you can reuse that same function again in a future material. Start building yourself a library of useful material functions, which you can use again and again. Ultimately that will save you a lot of time down the road and additionally it’ll keep your material graphs easier to read. I refer you once again to the Unreal Engine Documentation for more info about material functions. You can find a bunch of material functions I created in my FX and UI Functions pack and in future articles I’ll share some of my functions for free.
That’s it. I hope you learned something useful from this article. If you have any additional suggestions, questions or feedback, please let me know. If you find this useful, share with your friends. Take care and have a happy day! 🙂


